background

Tuesday, May 22, 2012

Ten on Tuesday


{1}
Have a fun and safe Memorial Day weekend!

It will probably be another home improvement weekend for us - although we won't be tackling anything as big as painting the house.

Maybe we'll squeeze in our first picnic of the year, weather permitting.

{2}
This week we added cantaloupe, bell peppers, watermelon, pumpkins and squash to our gardens.

I love summer!


{3}
Kendry gave me his first "You're not the boss of me, Mom" last week.

Yeeaahh...

For the first time in my life I got to say "Oh yes I AM the boss of you."

I said it with a very loving mommy tone of voice.... and an evil grin.

It was a mommy power trip moment.


{4}
I'm re-reading A Voice in the Wind (1 of 3 in the Mark of the Lion trilogy by Francine Rivers) for my women's Bible study this month. We have adopted a more relaxed book club approach for the summer months.

Oh. my. goodness.

If you haven't read this series, do it.


{5}
I am currently in denial of the fact that I turn 32 {32!} two months from today.
How did this happen?!


{6}
You have gotta try this move.


Looks simple enough, right?

Thats what I thought too.


{7}
Years from now, when Kendry is a teenager, I will remind him of the Home Depot trip in which he spontaneously burst out into "Hallelujah! Hallelujah! Hallelujah! Your love makes me sing! " in the middle of a crowded aisle...and then again while waiting in the long line to check out.

No inhibitions, that one.


{8}
In less than two months Justin and I will be participating in the Warrior Dash. This year they are teaming up to support St. Jude's Children's Hospital. If you are interested in donating please visit my fundraising page.

I am really looking forward to running another race with the hubs.


{9}
I love you, Dr. Suess, so please accept my apologies for burying you deep in the couch where the kiddo will never find you.

I just can't take it anymore!!!


{10}
This Week's Blessing:
My big brother got home from Afghanistan today!
We love you, Justin!
Praise be to God for keeping him safe.


Monday, May 21, 2012

Stained, Sealed and Delivered


This weekend we stained and sealed our concrete patio.


To see the progress on the yard/patio to date click HERE.


Saturday morning found the three of us in cutoffs and ready to work:


But only after Daddy did some posing for the camera.


Wooo, baby! Check out those calf muscles!


Right, back to the concrete.

It poured back in mid-April but we had to let it cure for a month before we could stain it.

So here is what it looked like au naturale on Saturday morning:


Kendry was such a trooper while Justin and I worked (he sprayed, I rolled).

We let Kendry help out a little.


First note: Kendry sticks out his tongue on every single task these days. Painting is no exception.

Second note: Yes, by this point in the day Kendry's cut-offs were history and he was indeed running around in his skivvies. Let's just say that Saturday will go down in history as one of our worst potty training days to date. Amazing how kiddos will do that on a day you have a big project planned, right?


Anyhew, after two coats of a stone colored stain we called it a day.

Then Justin followed up with two coats of sealant on Sunday.


Here is what it looked like Sunday afternoon - before the storm clouds rolled in and we started to cringe because the sealant isn't supposed to get wet for 24 hours.

Oh well, what can you do?

After:


Let's see that again.


Before:


After:


Now tell us the truth - do you think that the patio and the steps together add up to a little too much yellow?


Justin is trying out samples of wood stain just in case.

Personally, I love it.


Thursday, May 17, 2012

Baseball Cupcake Stand Tutorial


I am so excited to share this tutorial with you. I had a lot of fun constructing this project.


Every entertainer needs a cute cupcake stand, wouldn't you agree?

I built this baseball bat cupcake stand for our kiddo's third birthday party last week.


This was my main inspiration:

photo source (not original creator)


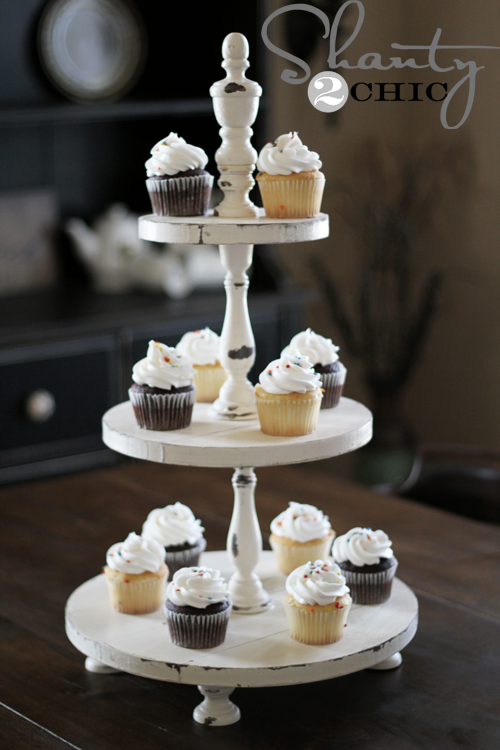
I also loved how Shanty2Chic used scrap wood to make planked tiers.


So pull out your tape measure and power tools and I'll show you how its done!


WHAT YOU'LL NEED:
scrap wood (I used 1x4s)

old wooden baseball bat (I found mine at the thrift store)

wood glue and/or E6000 glue

clamps

skill saw (I ended up using the skill saw, a hack saw and a table saw on this; its power tool ADHD I tell ya!)

paint

paintbrush

level

painting tape

athletic tape


STEP 1:
Timeline

First and foremost, do not put this project off until a mere week before your kiddo's birthday party as it will undoubtedly cause unnecessary stress. Unless you're a glutton for punishment like I am, I would suggest completing this project while you still have loads of time to spare.

I have said it before and I'll say it again: I have serious procrastination issues.

Now that I've covered that small detail let's move on...


STEP 2:
Make your tiers


Glue your scrap wood together like so using wood glue.

Then do a forehead slap once your realize that the wood clamps you have on hand aren't even close to being large enough for this task.

Doh!


Since it was 11pm and I had already applied the glue, I simply squeezed the wood slats together really hard and propped them up to dry, like so.


Who needs clamps anyway, right?


That was a joke.

Use clamps if you can.


Note: I like to keep scrap wood on hand for various projects such as this. Check the scrap bin at your Lowes or Home Depot to get good scraps for cheap. I especially like the 1x3 and 1x4 sizes.


STEP 3:
Cut your tiers
(I neglected to photograph this step - sorry!)

Once your glue has completely dried, measure and mark the lines for your two tiers. Then cut your wood accordingly.
Although my inspiration photos both had circular tiers, I liked the idea of a diamond tier better.

Get it?    Baseball?   Diamond?

I crack myself up.

By the way, did you know that a baseball diamond is actually just a square?

Straight cuts are sooo much easier than circular cuts anyway, so I went with the "diamond thats actually just a square" plan. Keep in mind I was on a tight deadline here.

I cut both my tiers 10x10.


STEP 4:
Sand and paint

After a light sanding I coated both diamonds with SW Creamy paint.


Once that paint dried I taped off my bases, baselines and pitcher's mound with Frog Tape (love this stuff!) before applying my green paint.

Don't forget to shape your home plate accordingly! :)


Remove your tape before the paint dries completely.


Finish with a clear coat.


STEP 5:
Cut your bat

My bat was too long to begin with - although I would be lying if I said the idea of a four foot high, six tiered cupcake stand wasn't mighty tempting.

Note to self: must make a four foot tall cupcake stand for my 40th birthday.

I hacked off the top and the bottom of the bat, and then cut out a middle section, making sure to match the circumference of each piece as close as possible so it wasn't totally obvious that I hacked the bat into multiple parts.


STEP 6:
Bat sanitization

Please make sure to sanitize your bat.

If you're a thrifter or yard-saler this goes without saying. I'm simply pointing it out as its own individual step so you can rest peacefully knowing I didn't buy an old dingy bat at the thrift store and use it to make a food platter without cleaning it first - particularly if you were a guest at Kendry's party and you ate a cupcake...

My first sanitizing step was to remove all of the yucky tape from around the grip of the bat. I don't even want to know how many hot, sweaty hands have gripped that tape over the years. And then, like I said, I cut off the bottom a few inches of the bat so most of the tape-covered portion was discarded anyway.
Then I gave my three bat pieces a good scrubbing with soap.


STEP 7:
Assembly!

Disclaimer: be sure you have wood glue or something like E6000 for this part. This author will not assume liability for any cupcake disasters arising from the use of cheap glue.

I can see the carnage already - the handle breaking off as you carry your beautiful homemade cupcakes outside to the party. The twenty plus cupcakes hitting the floor and rolling in twenty different directions. The delicious buttercream frosting splattering everywhere. Your birthday kiddo sobbing over the disaster: "Mommy broke my birthday cake!"

Oh the anguish!


Get the picture?

Use good glue!


And here is where you want to use your level. It doesn't need it to be architect perfect, but you will want it as level as possible to display your cupcakes in a pretty fashion.

I predrilled a hole in the end of my bat and in the center of my bottom tier.


Then I drilled a screw through the bottom of the tier into the bat, but not before I dabbed some E6000 glue onto the tip of the bat for extra hold.

With these two pieces attached, I put glue on the other end of the bat and placed the second tier firmly on top. I used my level here to position the tier correctly.


The little jug of paint helped hold the bat in place as the glue dried. I'm a 'use what you've got on hand' kind of gal.

Let this dry overnight.

Meanwhile, take the remaining two pieces of your bat and glue them together as well. Once that dries, use athletic tape to re-wrap the grip of the bat.
(sorry for the blurry photo)


Once all your glue is dry, glue the flat end of your mini bat to the top of the second tier, taking care to line up the separate pieces of your bat so they appear as one.

Allow to dry again.


And there you have it - your own custom made cupcake stand.


Throw on some baseball cupcakes and you're ready to party!


Sharing here:
Whipperberry

Tuesday, May 15, 2012

Ten on Tuesday


{1}
We've hit the low 90's this week and its fabulous!


{2}
Progress as of today:
still finishing the landing, steps and railing, and brainstorming the best place to install our sun sail shade.

Oh, and lots of clutter leftover from the birthday bash.


We've eaten dinner outside the last two nights.
To say that we are loving our new outdoor living space would be putting it lightly.


{3}
I am dying to accessorize our patio!
I am already visualing a cute bench by the door, beautiful planters placed here and there, a 'Patio Rules' sign, gentle lighting and comfy furniture.

But first we've got to stain and seal the concrete this weekend. Let's hope its not 90 degrees for that.


{4}
Take time to stop and smell the roses.

Take time to stop and weed the rose garden.

Take time to stop and dig for worms with your 3 year old in the rose garden.


{5}
I love it when the hubs picks up on something I've shared on the blog. (Hi, hubs!)

I got my first bundt cake pan for Mother's Day.
What can I say? That fella' knows how to make my baker's heart skip a beat. 

Or he just really wants me to make a rum cake.


{6}
I can't stop listening to Somebody That I Used to Know by Gotye. The video is strangely symbolic and the tune is so darn catchy, especially when Kimbra harmonizes.


{7}
The kiddo got his first tricycle for his birthday. Figuring out the pedals has triggered some frustration, but he just keeps right on trying. The patio is the perfect level surface for him to practice.


Am I the only one getting dizzy?


{8}
Our 'little' sprout measured 40.2 inches tall (100th percentile) and 36 lbs (80th percentile) at his three year check-up last week.

I would be curious to know what percentile his feet are in.


{9}
We are in serious need of a date night and I am itchin' to see The Avengers.


{10}
This Week's Blessing:
Hearing my little man tell me "Happy Mother's Day."

Such precious words.

But Mother's Day also finds me praying for those still yearning to become mothers.
My friend Ashley posted this beautiful poem this week.


"To those who gave birth this year to their first child—we celebrate with you

To those who lost a child this year – we mourn with you

To those who are in the trenches with little ones every day and wear the badge of food stains – we appreciate you

To those who experienced loss this year through miscarriage, failed adoptions, or running away—we mourn with you

To those who walk the hard path of infertility, fraught with pokes, prods, tears, and disappointment – we walk with you. Forgive us when we say foolish things. We don’t mean to make this harder than it is.

To those who are foster moms, mentor moms, and spiritual moms – we need you

To those who have warm and close relationships with your children – we celebrate with you

To those who have disappointment, heart ache, and distance with your children – we sit with you

To those who lost their mothers this year – we grieve with you

To those who experienced abuse at the hands of your own mother – we acknowledge your experience

To those who lived through driving tests, medical tests, and the overall testing of motherhood – we are better for having you in our midst

To those who will have emptier nests in the upcoming year – we grieve and rejoice with you

And to those who are pregnant with new life, both expected and surprising –we anticipate with you

This Mother’s Day, we walk with you. Mothering is not for the faint of heart and we have real warriors in our midst. We remember you."


Monday, May 14, 2012

Everybody Say Paaartay!


Saturday was Kendry’s baseball-themed birthday party.


Daddy finished the steps just in time too – although there is a wee bit of tweaking to be done before they are completely finished.


Our birthday party menu included hot dogs, peanuts, Baby Ruth candy bars and baseball cupcakes.


Naturally, we played a little ball.
(It was obviously a beautiful day for it too.)


It wasn't windy but I'll be darned if we couldn't keep those candles lit long enough for him to blow them out.


These cuzzies had so much fun together.


After missing his nap, Kendry finally crashed at 5pm...


 and slept through until 5:30 Sunday morning.


We love you, birthday boy!